Quick Explanation
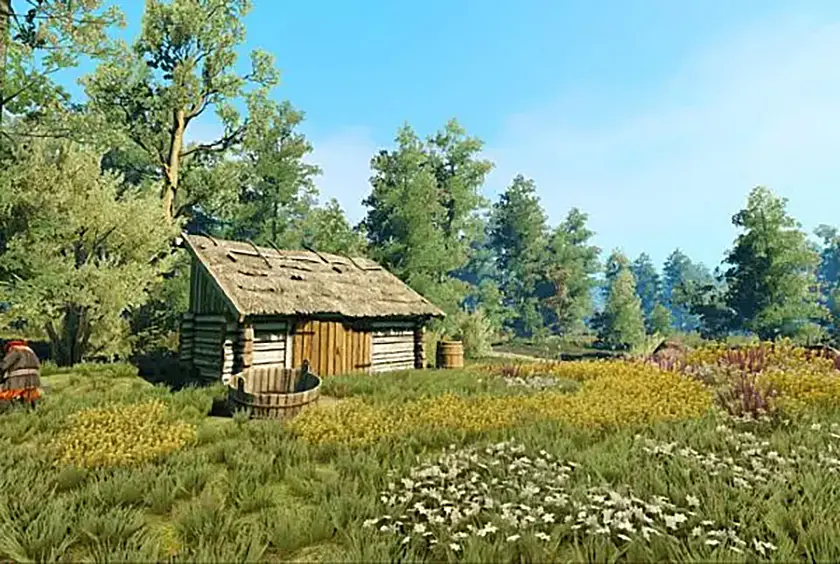
One of ReShade’s most defining features is generic access to the depth buffer of almost every game. The depth buffer is an image of the game scene, except it does not show the color of any object onscreen, but its distance to the camera.
It can be used to generate more advanced effects such as Ambient Occlusion, Depth of Field, screen-space ray tracing and more. Many of the most popular ReShade filters depend on working depth access. Games often use hundreds of different buffers (a “buffer” is really nothing else than some memory region holding some data) and each game works differently, hence it is a great challenge to automatically detect the correct buffer holding the depth. ReShade employs sophisticated methods for that and guesses right most of the time, but it is important to know how to troubleshoot when it does not.
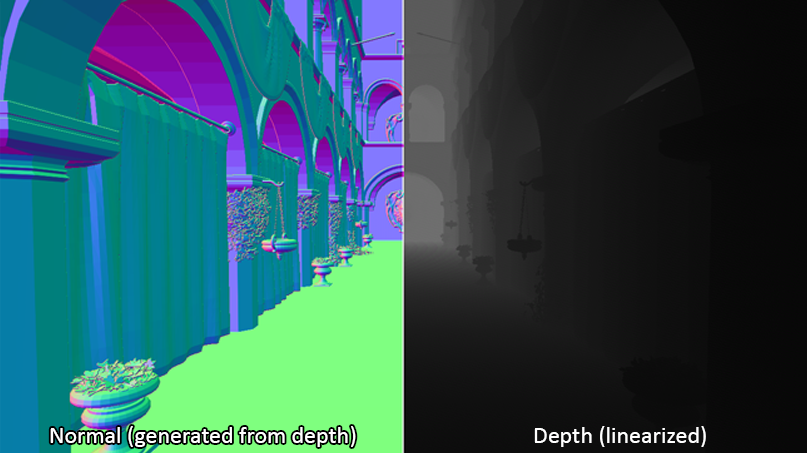
Furthermore, the data stored in the depth buffer is not in a ready format for the shaders to use, hence they have to be transformed/unpacked in a way that the depth data is proportional to object distance (as seen above). This is called linearizing the depth buffer. Luckily, there are only a few ways the data can be stored, so it’s more or less a trial and error to find the right way of linearizing it.
The following sections will cover how to check if everything is set up correctly and how to handle cases
when it is not.


Verifying the depth buffer is set up correctly
- Open up the ReShade GUI and enable the DisplayDepth shader which is included in the standard effects. Should you not have this effect, check the custom shaders page to find out how.
- By default, the right side will show the depth buffer (linearized with the currently selected method), whereas the left side will show a normal buffer. Since the normals are generated from the depth buffer, any problem with the depth buffer will show up in the normal buffer as well. Should the game have a vast draw distance, the depth buffer may be mostly black indoors, in which case the normal buffer is also very useful
- Ideally, the output looks like this (depth increasing with distance, normal buffer has green areas facing upwards): (If that’s the case, you’re golden and everything is set up correctly! If not, proceed.)
Fixing Depth Buffer Settings
- There are two ways to do this. DisplayDepth offers you realtime controls to play around with until everything looks right. But these settings have to be copied over to the global preprocessor definitions (controls that are global for every shader and require reloading the shaders each time they have been changed). As this process is counterintuitive, many users miss this, hence this guide will skip the realtime edits and instruct you to change these definitions directly so they are applied immediately.
- The following flowgraph covers almost every case:
Depending on where you ended up, here’s how to proceed:
Editing Global Preprocessor Definitions
- To apply the settings to preprocessor settings, click on the button Edit global preprocessor definitions on the Home tab. If you installed ReShade via the installer, these 4 settings should be present:

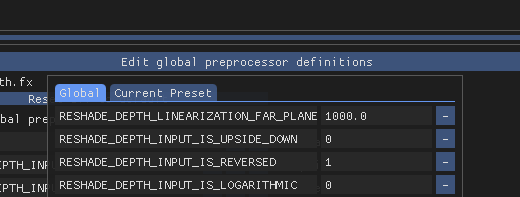
- Depending on the guide, toggle RESHADE_DEPTH_INPUT_IS_UPSIDE_DOWN or .._IS_REVERSED.
- LOGARITHMIC is a special setting that applies to some games, e.g. GTA V and The Witcher 3 should require this setting to be enabled, but the formula will cause the depth buffer to lose a lot of precision, making effects like Ambient Occlusion etc. produce numerous artifacts. As the changes of this setting are very minor and not worth the precision loss, it is recommended to leave this at 0 at all times.
Api Tab
- As mentioned on the GUI page, the API tab is called according to what rendering API the game is currently using. It can be called DX9, DX10, DX10.1, DX1, DX12, OpenGL or Vulkan. It shows a list of the most likely depth buffer candidates with the currently selected one being highlighted. If the currently selected buffer is empty or its content is wrong, experiment with these settings until you see something via DisplayDepth that resembles the scene. As the entries of this tab vary vastly on ReShade version and game, no screenshots here. You’ll figure it out 😉
- Should you not be able to fix the depth buffer or in case you are using ReShade on an online game, don’t worry. ReShade can still work magic without the depth buffer, you are only missing out on a fraction of the effects.
- One last comment: I was not completely truthful when I wrote that that there is no solution for ReShade disabling depth access in multiplayer games. ReShade releases are signed and most anticheat software developers whitelist them shortly after they are released. As ReShade is open source, it is possible to compile a ReShade version without this safeguard – but it will not be whitelisted by the anticheat. Should you have procured such a version, use at your own risk.
- If you don’t even know what you are looking for, you may start by getting to know ReShade itself.
- If you have any questions about ReShade or want to share some information with the community, please go to one of the following places:
